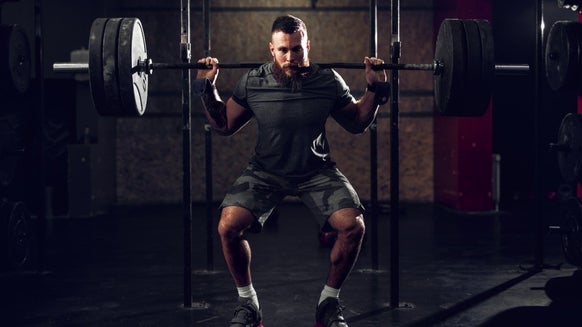
The deadlift, along with squats and bench press, is widely regarded as the "king of the exercises" and with good reason. It is a whole body exercise using multiple joints and multiple muscles simultaneously - the core (spine and abdominal muscles) provides the stabile base for the movement and the posterior chain muscles (upper and lower back, gluteal and hamstrings) and the quadriceps contract to provide the required movement.
Due to the vast amount of muscles being engaged at the same time a large amount of weight can be lifted thus allowing for a greater amount of muscle recruitment to be utilised. Add to this an increase in metabolism and its functional, real life applications (reducing injury when picking up and carrying heavy objects) it is easy to see why this exercise is, and always will be a go-to exercise for any fitness program.
How To Deadlift Properly

At first glance a deadlift looks pretty simple to execute but it does not surprise me to see many, many people executing this exercise poorly and even dangerously. If done incorrectly it can lead to muscle tears, spinal disc complications and other problematic issues so it is extremely important to make sure the technique executed is as close to perfect as possible from the start..
With this in mind I have broken down the key parts of a deadlift and tried to simply explain the do's and don'ts of each part of the lift:
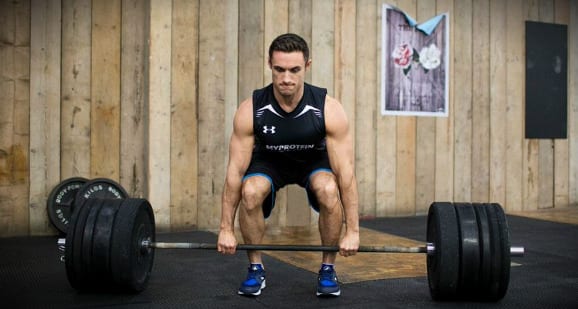
#1 Walk To The Bar
Feet should be hip width apart (any wider it will have an effect on arm placement which will change how the deadlift is executed), with the mid-line (where the toes attach) of the foot underneath the bar.
It will feel like when you go to lift the bar it will hit your knees and shins but do not worry, if done correctly the bar will pass them without touching.
#2 Grab The Bar Part 1 - Arm Placement
Stand with your feet under the bar and grip it with your hands shoulder width apart in whatever grip technique you desire (more on that later). If you grip the bar any wider it will increase the distance the bar has to travel making the deadlift harder and if you grip the bar closer (arms vertical) it has less distance to travel making the deadlift easier.
The arms when looking from the side should be at a slight incline with the shoulder-blades directly over the bar. If the shoulders are directly over the bar this will put a lot more pressure on the lower back in addition to the bar hitting your knees / shins when lifting.
#3 Grab The Bar Part 2 - Grip Selection
When grabbing the bar it is important to grip it lower down on the fingers and not higher up on the palm - as when the weight is held higher up the skin will get caught under the weight.
This firstly makes lifting very uncomfortable if not impossible and secondly can cause callus development damaging the skin and making deadlifting impossible for days after.
There are three main grip styles available that are utilised for different situations:
This is the standard grip for deadlifting with both palms face down on the bar and is ideal for warm up sets or workloads that can be comfortably achieved for a high amount of repetitions.
This is where your overall grip strength will be improve and should be used as much as possible until your grip begins to suffer due to higher workloads. When the weight is near impossible to hold anymore when lifting is when you should consider one of the alternate grips.
This grip, with one palm face down (pronated grip) and the other palm face up on the bar (supinated grip) is ideal for when the weight being attempted cannot be achieved with the overhand grip (normally in heavy strength sessions with reps of 6 or lower).
This grip allows more control due to the fact that as your overhand grip loses strength the underhand grip will pick up the slack. It is worth noting however that this grip can lead to muscular imbalances as the underhand grip will pull on the hips and shoulders more than the overhand grip so it is recommended to swap arms between overhand and underhand every set.
Ask any Olympic lifter to pick up the bar from a deadlift position and most, if not all of them will pick it up with this grip. It is identical to the overhand grip except for one major change - the thumbs will go under the palms gripping the bar directly.
This subtle change will allow the lifter a monumental amount of grip allowing a huge amount of weight to be lifted. It is only recommended for professional weight lifters or dedicated trainers.
#4 Bend Your Knees
With the hands in place bend your knees down until your lower and upper legs are roughly 45 degrees to one another (thigh muscles should be close to but not directly parallel to the ground). If you allow the legs to bend 90 degrees or lower this will turn the deadlift into a squat, this could be your goal however which is fine but for the purpose of this article we will keep it to deadlift technique.
When doing this your shins SHOULD touch the bar so do not try to pull the bar away from your body, make sure the bar stays over the midline of your feet at all times. At first this position might feel very awkward (due to a lack of flexibility in the pelvic girdle) but with practice you will be able to comfortably hold that position until you are ready to lift the bar.
#5 Lift Your Chest
Keeping the bar in place (do not try to move it) lift your chest so your back straightens, this is probably the most important technique if injuries are to be avoided.
If one is to have a rounded or hyperextended back while lifting the bar, it will put great stress on the back and discs of the spine, this compression of the spine discs can lead to disruption of the spinal nerve as well as the discs becoming dislodged (herniated discs).
So make sure to have a "neutral" spine, if you look at yourself in a mirror (don't this while lifting however as this can put extra on the spinal discs around the neck area) while in this position your back from your head to your hips should be completely straight.
#6 Pull The Bar
Now you are ready to pull the bar so take a deep breath in before you lift the bar, and then as you pull the bar up expel the breath while squeezing the abdominals. This contraction of the abdominals will help stabilise and support the back muscles through the pulling phase reducing pressure on the spine.
At the top of the pull try not to shrug the shoulders or squeeze them together and resist the urge to lean back at the top as will hyperextend the back putting pressure on the spinal discs in your lower back. When your hips and knees lock out you will have finished the pulling phase of the deadlift.
#7 Lowering The Bar
When you are ready to lower the bar back to the ground it is ESSENTIAL you flex the hips first (imagine you are going to sit down on to a chair) because if you don't you will hit your knees with the bar.
Once the bar reaches your knees bend them to lower the bar all the way back to floor (starting position).
Take Home Message
I hope this will give you some good tips and a great starting point to help you improve your own deadlifts!